Secretary Hutch refurbish and upcycle

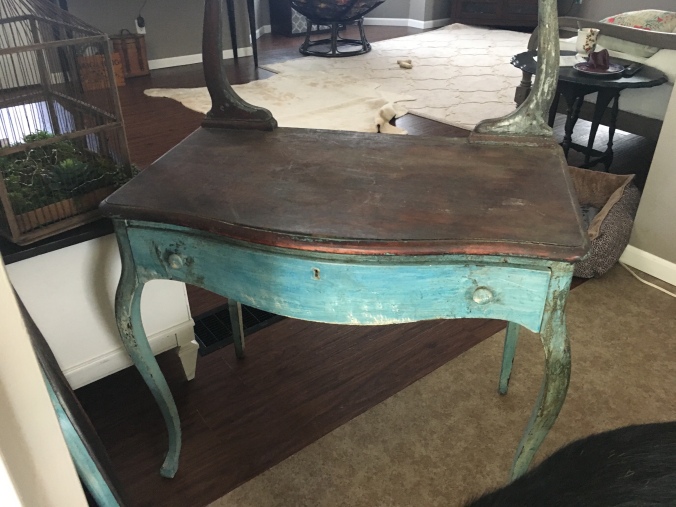
I’ve always admired my grandmas secretary hutch/curio cabinet. Finally I found one that fit a perfect spot under our stairs!

Secretary hutch curio cabinet antique refurbished upgrade

I found this gem on facebooks marketplace for $150. It appeared that it was already sanded down from a Robbins egg blue color, which meant that half of the work of prepping the wood was already done!

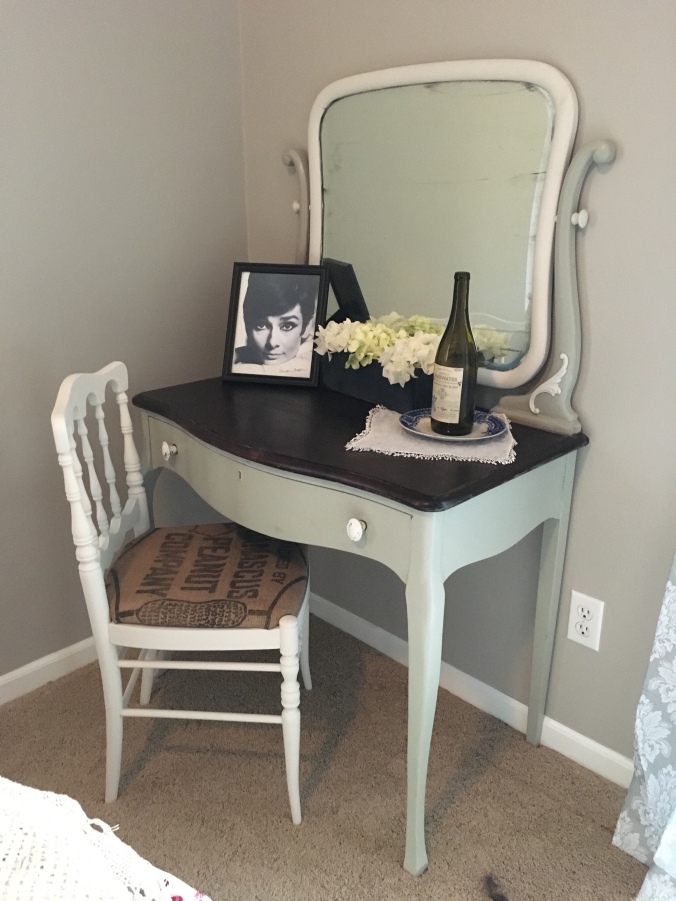
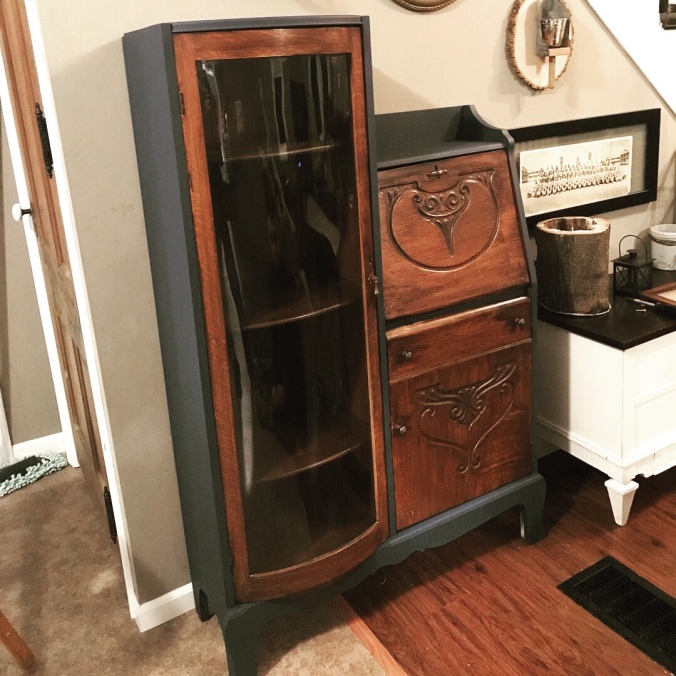
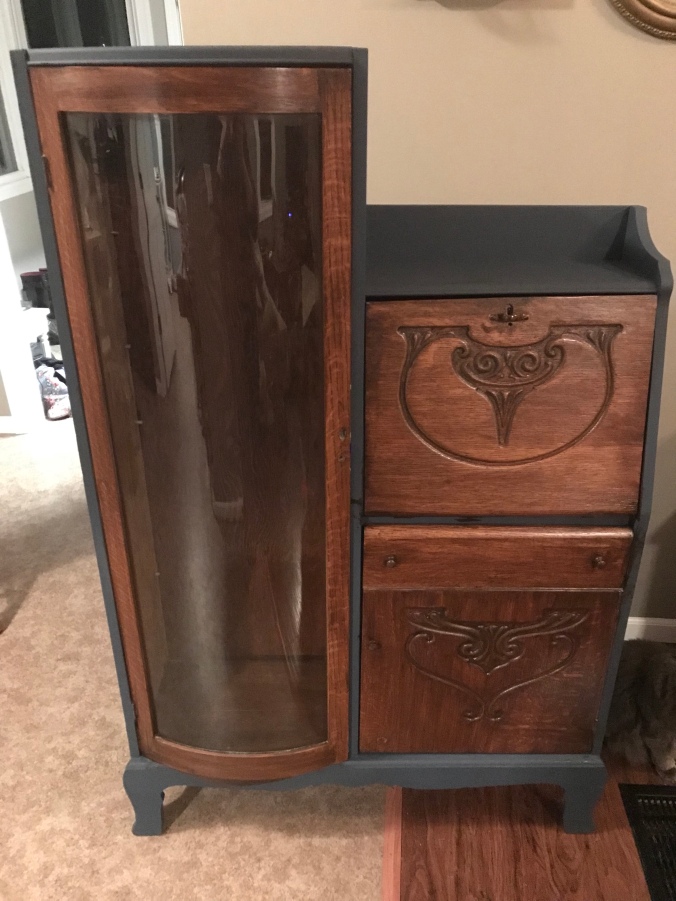
I lightly sanded with a fine furniture sand paper and could jump right in to paint and stain. I went back and forth between a flat black, French blue or ivory color. I sides with the French blue, not quite black but very different from the ivory I’ve done in my latest pieces. The paint I used was Benjamin Moore in Midnight Blue and the stain was Rustoleum in Kona.

Before I start I always try to picture which pieces I want to be painted and stained, usually I try to have anything that is stained either be the top or a table like surface or have it surrounded on all four sides by the paint color I have picked. I think this gives the piece balance and helps to highlight specific areas.

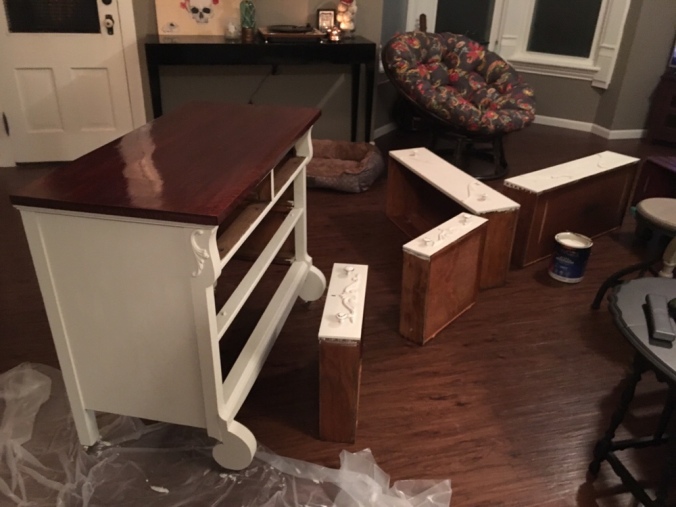
After painting the areas I wanted painted I applied the stain and decided to paint the inside bottom cabinet and stain the inside of the secretary area. I also stained the inside of the curio cabinet. The only thing I dislike is how dark the stain made the inside of the cabinet, but nothing that a small light couldn’t fix!

Antique secretary hutch curio cabinet makeover refurbish

The secretary cubby storage piece was separate from the inside of the hutch so I decided to attach it to the top of cabinet with several small finishing nails, now my laptop fits perfectly in the cabinet.

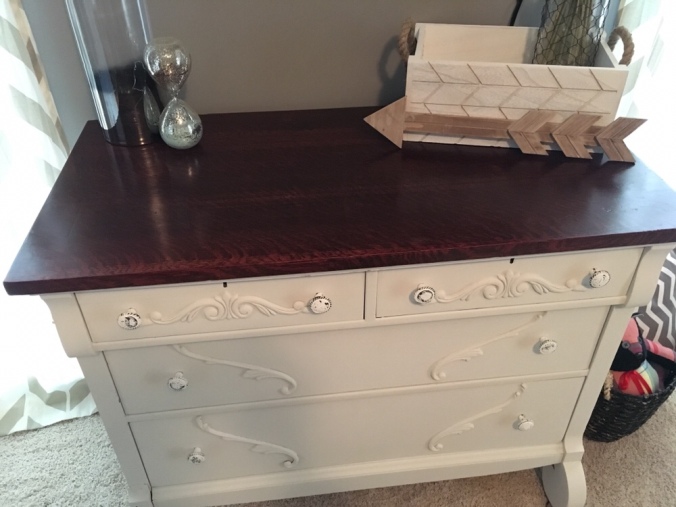
Now there is just more room to fit more antiques and junk!

Vintage Makeup Vanity Table Upgrade

My grandparents frequently drop off furniture or odds and ends that they no longer want or project pieces that they think I would have fun with. This horribly worn down vanity with the mirror was one of these items.

Vintage dresser makeup vanity remodel and upgrade

In the beginning it needed a lot of work! I removed the mirror which came off easily and took to using a furniture grade sandpaper to start taking off the layers or old paint that was giving this vanity a very rough texture. I sanded everything including the top wooden part, and this took a lot of time. Sometimes redoing furniture can be such a tedious task, especially when it comes to sanding because it is setting up the foundation of how good your piece will look!

After all that sanding (and there was a lot of it!) I decided why not sand a little more. I found this old chair for $3.00 at a local antique shop and brought it home. It was the perfect height for the vanity! I began by sanding the piece down and priming it before painting it white and using an old grain sack to reupholster the cushion.

Vintage makeup vanity dresser table remodel and upgrade

Unfortunately all I have left of this project are the finished product pictures. But after sanding the piece down and finishing the chair I painted the piece in a soft mossy pastel green color, that could almost be mistaken for off white, and painting the mirror in soft cream color. After the paining was finished I went back in and stained the top of the vanity with a dark stain and clear coated the top. I switched out the knobs for some I had found at Hobby Lobby and reattached the mirror.

And there you have it, a simple country vanity that can be completed in a weekend!

Bathroom Burlap Rustic Christmas Tree

I grew up in a household where every room had a Christmas tree… even the bathrooms. So by wanting to carry on that tradition I decided to put a gifted Christmas tree in the bathroom and wanted to decorate it with burlap and homey items that you would find in the kitchen and laundry room.

So by adding a burlap bow that I bought at hobby lobby for 50% off and wrapping the tree in burlap ribbon that I had bought at the dollar store I thought I was off to a good start.

Next I created some ornaments by taking apart clothespins and gluing them flat sides together and organizing them into the shape of a Star. The second ornament is Walmart brand mason jar lids that you can get fairly cheap. I added some leftover burlap I had on hand and added a bundle dried lavender. You could really almost add anything to the middle and use the mason jar lid as a background!

DIY burlap Christmas ornaments

I also added some burlap ribbons that I had found at hobby lobby, it’s seriously the best place to get your Christmas decorations!

Lastly I used some clear plastic ball ornaments I had gotten from the dollar store and used that same burlap to wrap them and gather the material at the top of the ornament and hot glue it in place, adding some green floss wrapped around the top as well, just to make it appeared tied there.

Burlap farmhouse Christmas trees

As simple as it is, I think it adds a good mix of simplicity and elegance. Only six more trees to go!

Coffee Bomb Bar out of Old Ammo Crate

Every now and then you find something at a shop that you don’t really know what you’re going to use that item for, but you buy it and hold on to it. That was the case with this ammo crate. I had carried it around with me, from house to apartment and left it alone, until I bought my house a year ago and found the best place to put it.

It’s slowly evolved into what it is now, but for starters we had tried to install old table legs to it and try to get it to stand on its own, however, the legs didn’t look right and the table was unstable.

So the table legs came off and we decided to attempt to create a floating “Bomb bar” for our Keurig. We started by taking off the top and using a drill to make pilot holes through the back of the crate.

Next, using long screws we drilled those into the studs of the wall and added two decorative brackets underneath the box to help support it a little more.

To help the Keurig fit into the box and slide up against the wall we used a drill again to drill out an area into the box, below the lid, so that the cord would fit into the box and drilled a hole through the bottom of the box so it could come out the bottom and plug in. Now because I thought having a cord hanging out of the bottom would not be very attractive, I wrapped the chord with hemp rope and hot glued it in various places to help it stay put.

Later, deciding that I wanted to use the lid of the crate to hang a rake head that I had found to hand coffee cups from, I was left trying to decide what I wanted to use as a lid. We decided to use glass that was cut to size and to fill the crate with straw and whiskey bottles.

Using wood plugs I drilled a small hole that would fit the plugs and used wood glue to hold them in place.

The wooden plugs I used like this,

After many years of carrying around the now coffee bar it was definitely worth the hassle!

Refinished Vintage Dresser DIY

After purchasing my first house a year ago I quickly realized that I was lacking furniture and my home was rather empty! Instead of spending hundreds of dollars that I didn’t have on brand new furniture, I decided to be frugal and green by buying second hand and vintage furniture at local shops and repurpose and refinish them myself. I found that as daunting a task as it may seem, it is way easier than I ever thought it would be and that once you begin to collect the necessary items to refinish furniture like sand paper and paint, it gets cheaper and cheaper to refinish each item.

One of the items I needed badly was a dresser! I found one at a local Amish owned second hand shop for $70, and spent approximately $15 in wood appliqués to help spruce it up a bit. The other items I found laying around my house and had purchased for previous projects.

While maybe not the prettiest piece of furniture initially, I fell in love with the rounded front feet.

To start the piece I stripped it down, gave it a good sanding with a medium grit furniture grade sand paper and wiped it down with a damp cloth. Then I added the wooden appliqués for a decoration with wood glue and clamped them on for 24 hours to ensure that they had dried.

I did the same with the appliqués and sanding to the drawers.

Dresser upgrade diy

After painting the body of the dresser and the drawers with two coats of a white flat paint, and staining the top with rustoleum wood stain in Cherry and clear coating the top it was time to replace the handles and reinsert the drawers. The handles I purchased at Hobby Lobby for 50% off!

Farmhouse dresser diyDIY French country dresser

I think that the finished project turned out great and looks like a much more modern piece of furniture that cost way more than $85!

On to the next one! Stay tuned for more reviews, hauls, DIY’s and overall miscellany!